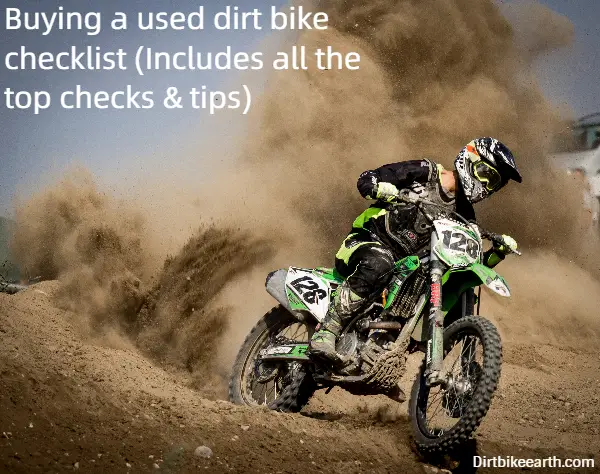
What should I look for when buying a used dirt bike?
How to not get screwed when buying a used dirt bike? It’s all too easy to get excited when you’re off to look at buying a dirt bike. But please practice restraint and please read this article first. But more importantly, and if nothing else, follow the top tips in this article for buying a dirt bike.
Buying a used dirt bike checklist:
The following checks should be made before you buy any used dirt bike:
Does the bike run and operate?
Check for low compression.
Try to start the dirt bike.
Test ride the used dirt bike.
Is the air filter clean.
Inspect the radiator for damage.
Check the oil.
Check the bearings.
Are the brake disks and pads worn.
Inspect the wheel rims for cracks or bends.
Is the sprocket and chain worn.
Look for broken plastics, seat cover tears and bent or broken clutch or break levers.
Look for leaks.
Inspect the frame and chassis for damage.
Review ownership and paperwork including the chassis number.
What does the owner’s garage or she appear like?
Negotiate the price.
1. How well does the bike run and operate?
When you arrive check if the bike is warm by touching the side of the crank case with the side of your hand. If it’s warm the bike has been started before you got there. This could mean there is something wrong.
Buying a used dirt bike checklist top tip: Tell the seller you want to see the used dirt bike start from cold when you call to arrange the viewing.
2. Kick the bike over a few times before you start it to check for low compression
Doing this will give you an indication whether the bike has got good compression or not.
In order to check the compression without a compression tester, you’ll need to kick the bike over a few times without it starting. To do so, position yourself on right side of the dirt bike where the kick start should be. Face the back of the bike and hold the handle bar with your right hand. With your left foot, gently push the kick starter away from you and feel for resistance. If there’s no resistance, then the compression is low. Don’t buy this used dirt bike!
Buying a used dirt bike checklist top tip: Bring along a compression tester which will give you a good idea of the compression at the top end. With a quick Google search you’ll be able to check what the compression PSI should be for the make and model of the used dirt bike you’re looking to buy. Check this before you leave to view the bike of course. To be fair to the seller, to get the best reading for a compression test is to warm the engine first.
3. Try to start the dirt bike
Ask the seller to let you kick start the bike. If it doesn’t start after kicking it for what seems like forever, this will indicate there’s something wrong. But you would expect a 2 stroke to take anything up to 8-10 kicks to start when cold, as the fuel needs to start “pumping” at the beginning.
If the used dirt bike is a 2-stroke and it won’t start, that could indicate worn top end, which indicates low compression. If you’ve already done step two above, you should already know if this used dirt bike has low compression.
Alternatively, the problem could be a carburetor problem too.
If however, it’s a 4-stroke it could also be low compression where it has a worn the top end. But it’s more often a problem with the valves being out of adjustment.
4. Test ride the used dirt bike
Ideally before you buy a used dirt bike, you need to try it out. But of course the seller may worry about you stacking it (i.e. crashing). But also, they may not have a suitable place for you to test ride it. When you test ride someone else’s dirt bike always be respectful and careful.
When you test ride the dirt bike, you’re checking for the following:
Engine ower: Does the bike have reasonable power when you open it up?
Brakes: Do the brakes work okay. Test each brake independently to make sure each works as they should.
Test the clutch: Does the clutch work okay. Make sure it’s not slipping and when it’s depressed the gears shift okay. To test whether the clutch is slipping is to put the bike into third or fourth gear and open the throttle. The bike should pull without any lag.
Shift through the gears: Try to test ride the used dirt bike along a reasonable straight bit of track to allow you to shift through all the gears. Go up and down through the gears a few times to make sure they all work well and “click-in” how they should.
Check for “popping”: Not something you get on a 2-stroke dirt bike, but may happen on a 4-stroke dirt bike. To test for this get into say third gear and take the bike up to the top of the rev range in this gear. At this point close off the throttle so the bike slows using the engine. If you hear “popping” from the exhaust or if the bike is back-firing, this could indicate a problem with valve timing.
Check for bent brake disks: On the test ride and when you’re braking, if you feel a shudder or some pulsating as you brake, this indicates a bent disk.
Buying a used dirt bike checklist top tip: Ask to meet the used dirt bike seller at a place where you can test ride the bike. Plus make sure to take at the very least your safety helmet to wear when you ride the bike.
5. Check the air filter
You should check the air filter, which on most dirt bikes will be under the seat. Ask the seller if they are okay you remove the seat to check the filter. If they refuse, walk away.
Assuming they are okay you check this, check the filter to make sure it’s clean. If not, this could indicate other problems. A dirty air filter may mean they have not kept up routine maintenance on the bike. I would also suggest removing the air filter, even if it’s clean. This way you can check the air intake chamber to see if the chamber reflects the cleanliness of the filter.
If not, then they’ve only just replaced the filter to sell the bike to make it look okay. A dirty air intake may mean that dirt has made its way inside the engine, which will cause unnecessary wear and tear on the valves, the piston and the piston rings etc. Take a read of this article if you want to see how you should clean your air filter.
6. Checking the radiator on a dirt bike for damage
Often times on a dirt bike the radiator can take a bashing as its on the font on the dike. Open the water filler cap to make sure it is full of water. Check around the rim of the radiator filler cap for any white substances. White substances here could indicate a blown head gasket.
Look the radiator over for bent cooling fins and cracks. But also make sure it’s not leaking but looking under the bike for water splashes or puddles.
7. Check the oil
If there’s a dip stick pull this out, which not all bikes have. If not open the oil filler cap to check the oil. Ask the owner how often the engine or transmission oil. If the oil looks really black and is quite thin, this could indicate its been a while since it was changed.
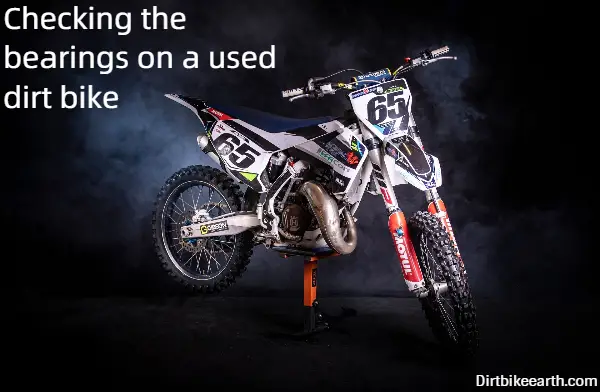
8. How to check the bearings on a used dirt bike
There are three main sets of bearings to check on a used dirt bike. These are the shock linkage bearings at the rear, the wheel bearings and the steering head bearings.
How to check each bearing:
Rear shock linkage bearing
Either put the bike on a stand with the rear wheel off the ground and try to move the rear wheel up and down. If the bearings are sound there should be no movement.
But do remember it’s a second hand dirt bike after all, so you’d expect a small amount of movement, but not more than 4-5mm. If there is more than 4-5mm, then there’s too much wear on the bearings and they will need replacing
If you don’t have a bike stand, you can do the same check by lifting up on the rear mud guard to check for movement.
Be aware that some dirt bikes have a lot of movement or “slop” in the rear shock linkage. This could cost upwards to $200 to fixed, so be wary.
Wheel bearings – front and rear
If you have a bike stand, whilst the rear wheel is still off the ground from the rear shock bearing test, spin the wheel to check the rear wheel bearing. Listen or feel for any squeaking or grinding noises and make sure the wheel spins freely.
Then grab the wheel and try to move it from side to side. You’re looking for play or movement. If there’s movement these bearings will need to be replaced.
Do the same tests for the front wheel too.
Checking the steering head bearings
With the front wheel off the ground, ideally using a stand, pivot the handle bars from side to side to make sure this is operating smoothly.
After this, take the bike off the stand and put the front brake on. With the front brake depressed, rock the bike back and forth to check for “slop”. If there’s any slop, this will indicate worn steering hear bearings.
9. What to check with the brake disks and pads
To check wear on the brake disks, run your finger across the part of the disk where the pads contact to the disk (i.e. the braking surface) to one of the mounting surfaces which joins the disk to the centre.
You’re checking for a lip and if there’s any sort of lip this indicates wear. If the lip is very well pronounced, the disk will need replacing.
Then check the brake pads for the amount of material (or braking pad) left on the brake pads. You’re looking for several millimetres or pad so you won’t have to immediately replace them if you decide to buy the bike.
Finally, spin the wheel and watch for a bent brake disk. If the disk is bent you may spot it as it runs through the pad or you may feel it. But this should have been picked up on the test ride, as a shudder or some pulsating when you brake, this indicates a bent disk.
Do this same check on the front and rear brakes.
Buying a used dirt bike checklist top tip: Be careful when checking for wear on the brake disk if you’re doing this after the bike has been ridden. Brake disks and pads get hot and you could burn your finger!
10. Checking the wheel rims for cracks or bends and the tyres
With the wheels, you’re checking for missing or broken spokes, cracked or damaged rims and of course check the tyres for where and tear. When you do this check, run your eye around the whole of the rim on both sides of the wheel checking for cracks.
11. Checking the sprocket and chain for wear and tear
Check the front and rear sprocket for wear. Each of the teeth on the sprockets should be rounded and not pointed. Pointed teeth indicates significant wear and will mean the sprocket needs replacing.
Also, generally check the sprocket for wear and/or missing teeth too.
To check the chain, try to pull the chain away from the rear sprocket. If there’s a lot of play in the sprocket at this point the chain is worn and needs replacing. The other check is to test the side-to-side movement on the chain between the rear and front sprocket. If you find a load of play, this will also indicate a worn chain too that needs replacing.
Finally check the chain guides on the top of the rear swing arm and underneath too. Make sure to chain for significant wear and tear on these two items.
12. Generally check-over of the bike for broken plastics, seat cover tears and bent or broken clutch or break levers
The overall check on the bike for dents, scratches broken plastic, a torn seat cover, bent handle bars, worn tires etc, will give you a general feel for how well love the dirt bike is.
The well worn and damaged bike could imply a well worn and damaged engine, clutch and gearbox. I suggest you stay well clear of dirt bikes like this.
13. Check over the whole dirt bike for leaks
You are checking for leaks of oil, brake fluid and water coolant.
Check the front fork seals that they aren’t leaking. With the front brake depressed push down on the front suspension to look for any oil leaking from the fork seals.Also, check under the seat for any leaks from the rear shock too.
Check under the engine for oil leaks. Ask the owner if you can lean the bike on its side to have a good look on the underside of the crankcase for oil leaks Also, have a general look around the engine casing for any other leaks for oil and water coolant from around the water pump.
Also, check around the brakes and the brake reservoirs for brake fluid leaks.
14. Checking the frame and chassis for damage
The first check is to check from the rear of the bike and look along the rear mud guard. You are checking to see if this is in alignment with the rear wheel. Look down the length of the bike to see if it all looks straight. If not then the bike’s been in an accident and possibly has a bent frame of chassis.
But also then look for any cracks, fractures or repair jobs on the frame and chassis too.
15. Checking for ownership and the paperwork including the chassis number
Check over the bike’s registration documents and agree the chassis number to these documents. Obviously, if the chassis number has been scratched off, this dirt bike has been stolen at some point. If the chassis number is scratched off or doesn’t make with the paper work and registration documents, don;t buy it!
16. What does the owner’s garage or she appear like?
Observe and have a look around the seller’s garage or property where they’re selling their dirt bike from. If the garage or shed where they store the bike is a complete mess, you can probably bet that they are lazy and won’t have looked after their bike very well either.
17. Negotiate the price
Before you go to see the used dirt bike, make sure you have a good feel for the prices for dirt bikes or the same model and age. Get an idea from doing your research into how much things cost to replace or repair on the particular brand of dirt bike.
It might be you pick something up on your check-over of the bike, which may not put you off buying it, but that would be enough to create a negotiating point.
However, if during your check of this dirt bike you find a lot wrong with it, you are probably best to walk away.
Buying a used dirt bike checklist final top tip: A tip for negotiating a good price is to go with cash. Only take the amount of cash you’re willing to pay. At the end of the bike check, pull out your bundle of cash and count it out to the owner. Offer the cash there and then. Often times owners find it hard to refuse hard cash right in front on them. This is even if it’s less than the asking price. However, having said that be respectful and don’t insult the owner. Don’t be a complete dick with an extremely low-ball offer either, but it’s okay to deduct reasonable amounts for any work that needs doing!
I hope you enjoyed this article about buying a used dirt bike checklist
I’d love to hear from you. Tell us about your adventures of dirt biking in the comments below. Please also share your photos. Either from your cameras or videos from your Gopro’s!
If this article hasn’t answered all of your questions. If you have more questions about dirt biking (or specifically about buying a used dirt bike checklist), please comment below with your questions.
There will also be many more articles about dirt biking for you to read and learn about this fabulous sport and hobby.
Have fun and be safe!
Buying a used dirt bike checklist (Includes all the top checks & tips)
Related Posts:
The best dirt bikes for 12-13-year-olds (Parents… The best dirt bikes for 12-13-year-olds will have an engine cc somewhere between 65-125cc. The power of the dirt bike will depend on your child's maturity, their physical size and…
The best dirt bikes for 9-10 year olds (Parents… The best dirt bikes for 9-10 year olds will have an engine cc size ideally between 65-85cc. The power of the dirt bike will depend on your child's maturity, their…
How To Make A Dirt Bike Street Legal (Without… How to make a dirt bike street legal depends on the type of dirt bike you have and your budget. You are better off buying a dual sport version of…
")
")
")
")
